EDI Viewer - AC5 Form |
The AC5 Form window is used to edit and enter AC5 forms for your client codes
The Client Code: list box at the top left of the window lists all client codes you can file AC5 forms for. Picking a selection from this list box will populate the Select an AC5 list box at the top right of the window.
The Select an AC5: list box at the top right of the window lists the date prepared and production year for all AC5 forms for this client code. Picking a selection from this list box will show you that AC5 form. This allows you to see a complete audit trail of AC5 forms. The list box at the top of the window will be empty for new AC5 forms until you enter your data and save it.
Picking an AC5 from the list that is not the most recent AC5, will put that AC5 form into a Read Only status. Since there is a newer AC5, all previous AC5s cannot be edited preserving your audit trail, but still allowing you to view and print them. This rule has an exception and the exception is, if the latest AC5 is an amendment for a previous year, you can still edit the AC5 for the most recent production year. ( if your latest AC5 was an amendment for 1997 and you had a 1998 AC5 entered, both of these forms would still be editable).

To add a new AC5 or edit an existing AC5, do
the following:
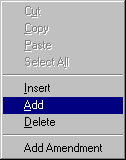
To add or insert a new AC5 or Custom Processing Fee Paid entry, you can do any one of the following:
To delete an AC5 or Custom Processing Fee Paid entry, click on the AC5 form or Custom Processing Fee Paid entry and do any one of the following:
|
 |
Business Rules:
|
|
| To enter AC5 Part 3, click on the tab Part 3. When you change tabs, your data is saved, so in this case, all data on tab AC5 - Parts 1,2 would be saved if it passed validation. Use the same method on Part 3 to add, insert, or delete rows. | |
| To Print an AC5 form, click the Print toolbar button or choose Print from the File menu. It does not matter which tab you are on when you print. |
![]()